Showing posts with label Jen Waugh. Show all posts

Friday, November 29, 2013

Shabby Chic Heart - Jen Waugh


Hi everyone, Jen here with my second November project. Sadly, this is my last Design Team project for Zeus and Zoe. I have had such a fantastic time during my time on this Team. Marivic's products are beautiful and it has been great to get to know the other ladies on the team.  It really has been such a pleasure to be here.

My last project created was a shabby chic heart wall hanging.


I used some vintage lace to cover a wire heart. The vintage handkerchief was from my DT pack and the whole wall hanging was created around it. I loved the colour and embroidery on it and the rest just came together.


I added one of the beautiful vintage postcards from my pack to the cluster. It really complemented the heart. I also used some beads and diamante from my pack to create a handmade hat pin. I also made the ribbon flower and the ribbon cluster with bits and pieces from my pack. The lace doily was also included in my pack, I just cut it from a larger piece.


My friend fell in love with the heart so it now has pride of place in her house.

All items are available in the Etsy shop. Please take a moment to drop in and find something to create for yourself. The products are so versatile and beautiful. Hopefully I have shown during my term that they are not just for scrapbooking.

It has  been an absolute pleasure to share some of my altered projects here on Zeus and Zoe.  I want to take this opportunity to thank Marivic for having me on her team. For giving this "unknown" name the chance to create with her beautiful products. 

Jen xxx


Friday, November 15, 2013

Vintage Hat Box by Jen Waugh


Hi everyone and welcome to my first post for November. 

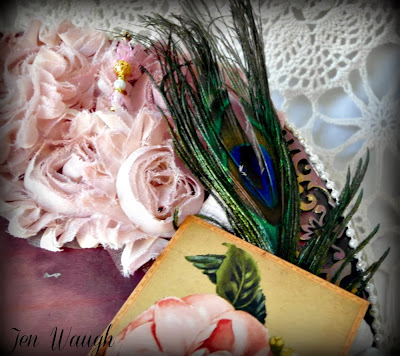
We have free play this month so this means we get to make what we want using our Zeus and Zoe products. Marivic sent me a gorgeous hat box with my DT pack. I decided for my first project to alter it a bit. Being a lover of all things vintage, the images and embellishments from my pack were perfect.


I used the beautiful vintage, Love post card from my pack to embellish the side, I added some pearl and paper flowers to make it stand out. The little button is from my own stash and is Prima. I made some ribbon flowers, my first attempt and I was pleased with how they turned out.


The pretty fabric flowers were cream when they arrived in my pack. I wanted to make them blend into the image better, a quick spray with some mist anfd they turned out a pale pink. I added a hat pin that I made myself and a peacock feather. 


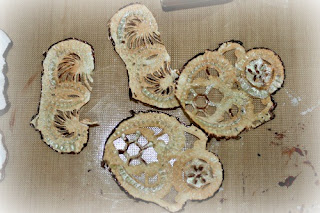
I cut up my Dusty Attic and added it to the edges. They were sprayed with some mist first and I used gold Run n Buff to add some interest to small areas.


The doily and vintage brooch were also included in my DT pack. Aren't they beautiful?


I love this vintage image that was included in my pack. 


Thanks for joining me, I hope that you liked my vintage hat box.   Check out the Zeus and Zoe Etsy shop to have a look through all Marivic's products. Would love to see what you create with them :-)

Until next time, Jen xxx


Saturday, October 26, 2013

Young at Heart Layout by Jen Waugh


Hi everyone, Jen here again with my second project for October. I realised that I hadn't done a layout during my term so decided that with Halloween just around the corner, I would do bit of a "dark" project. The colours are still within the Zeus and Zoe October "Steamchic" theme for this month.


I used the Polish paper manufacturer UHK Designs on my layout and the collection is My Dear Watson.


I added some lace and vintage buttons from my DT pack, I loved how the buttons complimented my colour scheme.


I loved this industrial chic metal charm from my pack and knew it would look great on my layout. The flower is from Manor House Creations and was included in my pack.


To get the textured effect, I used a Kaiser Craft mask with some texture paste. I sprayed with Tattered Angels mist in Sand Beige. Once that was dry I accentuated some of the masking with Tim Holtz Distress Ink in Tea Dye. I also used this to ink my distressed edges.

I heat embossed my 2 Crafty Chipboard with black embossing powder to get the metallic effect. The title sticker is from Prima.


Thanks for joining me in my last post for October. Have a safe and enjoyable Halloween weekend. See you all next month.

Jen xxx

P.S The young girl in the photo is in fact me taken during my "goth" phase in the late 80's ;-)


Saturday, October 19, 2013

Always Be Different Canvas - Jen Waugh

Hi everyone, Jen here with my first project of October. Our theme this month is "Steam Chic", a combination of Steam Punk and Shabby Chic devised by Charlie. We had a specific mood board to work with and I loved working with the colours on it.

I have been wanting to use this photo of my daughter for some time and this theme just seemed to fit in with it perfectly. My daughter is a Photography student in Scotland and they had a Steam Punk  photo session with the make up department. I love the fact that my daughter takes after me in that she doesn't follow trends, she just goes with her individuality. 

So here we have my canvas. "Always Be Different"


I covered my canvas with a layer of tissue paper, then used various mists to get the different colours in the mood board. I used a combination of Tattered Angels and Ranger.


All the laces, flowers and the majority of the trinkets were included in in my DT pack and are available in the Zeus and Zoe Etsy store. The key and key hole are Tim Holtz and there are some Prima (Finnabair) Mechanicals cogs.


After I added all my trinkets, lace, chip board, flowers, mesh and other embellishments I used Luminarte Twinkling H20's  to paint them. I finished the canvas off with a layer of Gel Medium.


I hope you like my canvas and remember "Always Be Different". It now takes pride of place on my daughter's lounge room wall in Scotland.  I will be back on October 31st when I will be sharing a spooktacular blast from my past. 

Jen xxx


Friday, September 20, 2013

Altered Eiffel Tower

Hi everyone, or should I say Bonjour :-).  Jen here, hope everyone is having a good month so far. Thanks for joining me today for my mid month project. I have loved our theme this month so far, using pretty pastel colours. I decided to do something a bit different for this project and altered an Eiffel Tower that I picked up from a local shop. 

When I bought the Eiffel Tower is was a black metal, I knew I wanted to shabby it up a bit so this theme was perfect.


I gave to Tower a couple of coats of Gesso to prime it. This stage took me a few days. I then used some pastel pink acrylic paint to give it the effect that I wanted. I used a round cake tray as the base, glued on some Kaisercaft paper. I used doily and brick stencils to add some texture to the base. These were both from Crafters Workshop.


I added one of Marivic's stunning tags to the second level of the tower, it fit my Parisian theme perfectly. The pink doily and the metal flower from my DT kit were perfect additions. The flower was originally red, I gave it a coat of Gesso and some pink paint.


The metal locket embellishment was also in my DT kit and available in the Etsy store.


The trees and vintage Parisian ladies were downloaded from the internet and glued on to the base. I used cocktail sticks to give them some extra stability. The beautiful lilac trim is also available in the Etsy store.


Another close up of Marivic's tag. I love these handmade tags. The photo underneath shows the 3D dimension added to it.

.
Thanks for joining me this month and taking the time to look at my Eiffel Tower and Parisian street scene.

Until next month.

Jen xxx


Friday, September 6, 2013

Altered vintage hand mirror by Jen Waugh


Hi everyone and welcome to my first post of September. Our DT theme for this month was a beautiful selection of pastel colours. I'm very much a shabby chic/vintage girl so the colour palette was perfect for me.

I decided to alter a vintage mirror.


I started off by giving the silver mirror a coat of Gesso to prime it. I then gave it 2 coats of pink pastel acrylic paint. The distressed effect you see on the handle is Rub 'n' Buff. 

I downloaded the pretty vintage lady from the internet and then used some Prima Tea Thyme cut off's to frame her on the mirror.


I decided to try and experiment a bit with hand dyeing lace and the selection I got in my pack was perfect. I cut round the edges of one of my doilies and created a trim. I then used the skin of n avocado and boiled it for 15 minutes. Place the lace into the mixture, boil again for 25 minutes and my cream lace is now a beautiful shade of dusty pink. The colour will vary depending on the fabric that you use. I love the effect and will definitely be trying it again. I finished off with some Prima beaded trim and some pretty pink ribbon from my pack.

Hope that you like my vintage altered mirror, see you later in the month.

Jen x


Saturday, August 17, 2013

Jennifer's Altered Box


Hi everyone, Jen here again sharing another project and my first tutorial with you.

Our theme at Zeus and Zoe this month is Altered Vintage so I decided to create an altered vintage writing desk. I got some beautiful images in my DT pack, along with some gorgeous lace and doilies, the hardest decision I had was what to choose.

My writing desk was one of the Off The Page range from Kaisercraft and started out looking like this:


The first thing I did was paint all the edges and add the vintage music sheets provided in my DT pack. I cut up one of the paper doilies in my pack and glued them to the corners of my image. I then used a stencil and some modeling paste to add some texture:


After everything had dried, I used mists, inks and some Luminarte Twinkling H20's to get the desired colour blend. I stitched up the bottom of the doilies to create a flower shape, added some of the vintage buttons from my pack and that was it.


I finished off by inking round the edges of the box with Tim Holtz Tea Dye ink pad and added the Tim Holtz feet to the base. The knob came from Kaisercraft and I added a beautiful, vintage pendant from my pack to make it look pretty.


Now on to my tutorial. I wanted to add one of Marivic's butterflies to the writing desk but the colours just didn't fit in with my design. Here is what I did to change them:

First I applied a coat of Gesso to cover the pattern. 

I wanted to add some interest to the wings, so again I cut some of the paper doilies as seen above. 

I blended in some Tim Holtz ink in bundled sage and tea dye, then used some Smooch to paint the middle and give it an outline.


The only thing left was to glue it all together and add some pearls from my pack. This was the end result:


Thanks for joining me today. 

Jen x